https://yabb.jriver.com/interact/index.php?topic=119957.0
Step 2. Ripping the disc to MKV.
Converting a DVD to audio tracks involves two steps, first ripping the disc to MKV, and then extracting the audio track we want from that to make MKA files.
To rip the disc to MKV, use the free MakeMKV tool: https://www.makemkv.com/download/
When you open MakeMKV it will scan the disc, and present a list of titles:
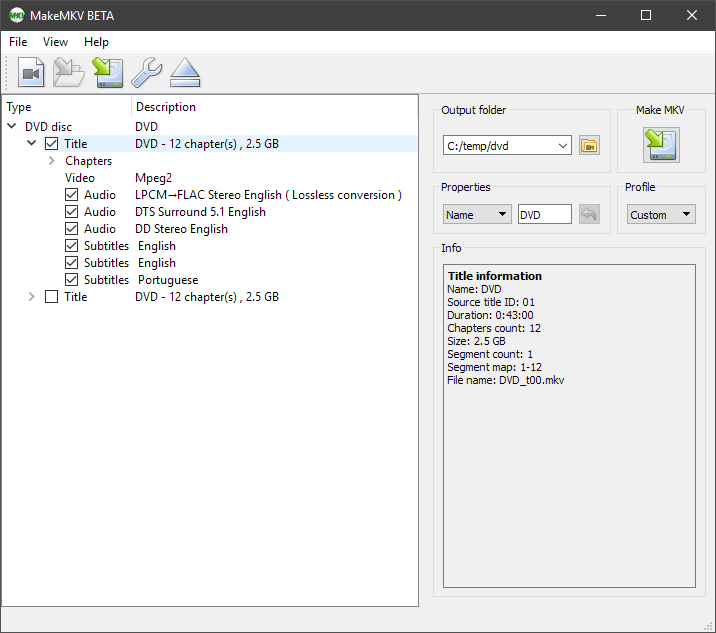
Select the titles and tracks that you want. We're going to split these out later, so you really only need to select the title. The process will take a few minutes.
Step 3. Extracting the audio tracks.
For this we need to use MKV Merge, which is part of MKVToolNix: https://www.fosshub.com/MKVToolNix.html
Its interface might seem a bit overwhelming at first, but it's not too complicated.
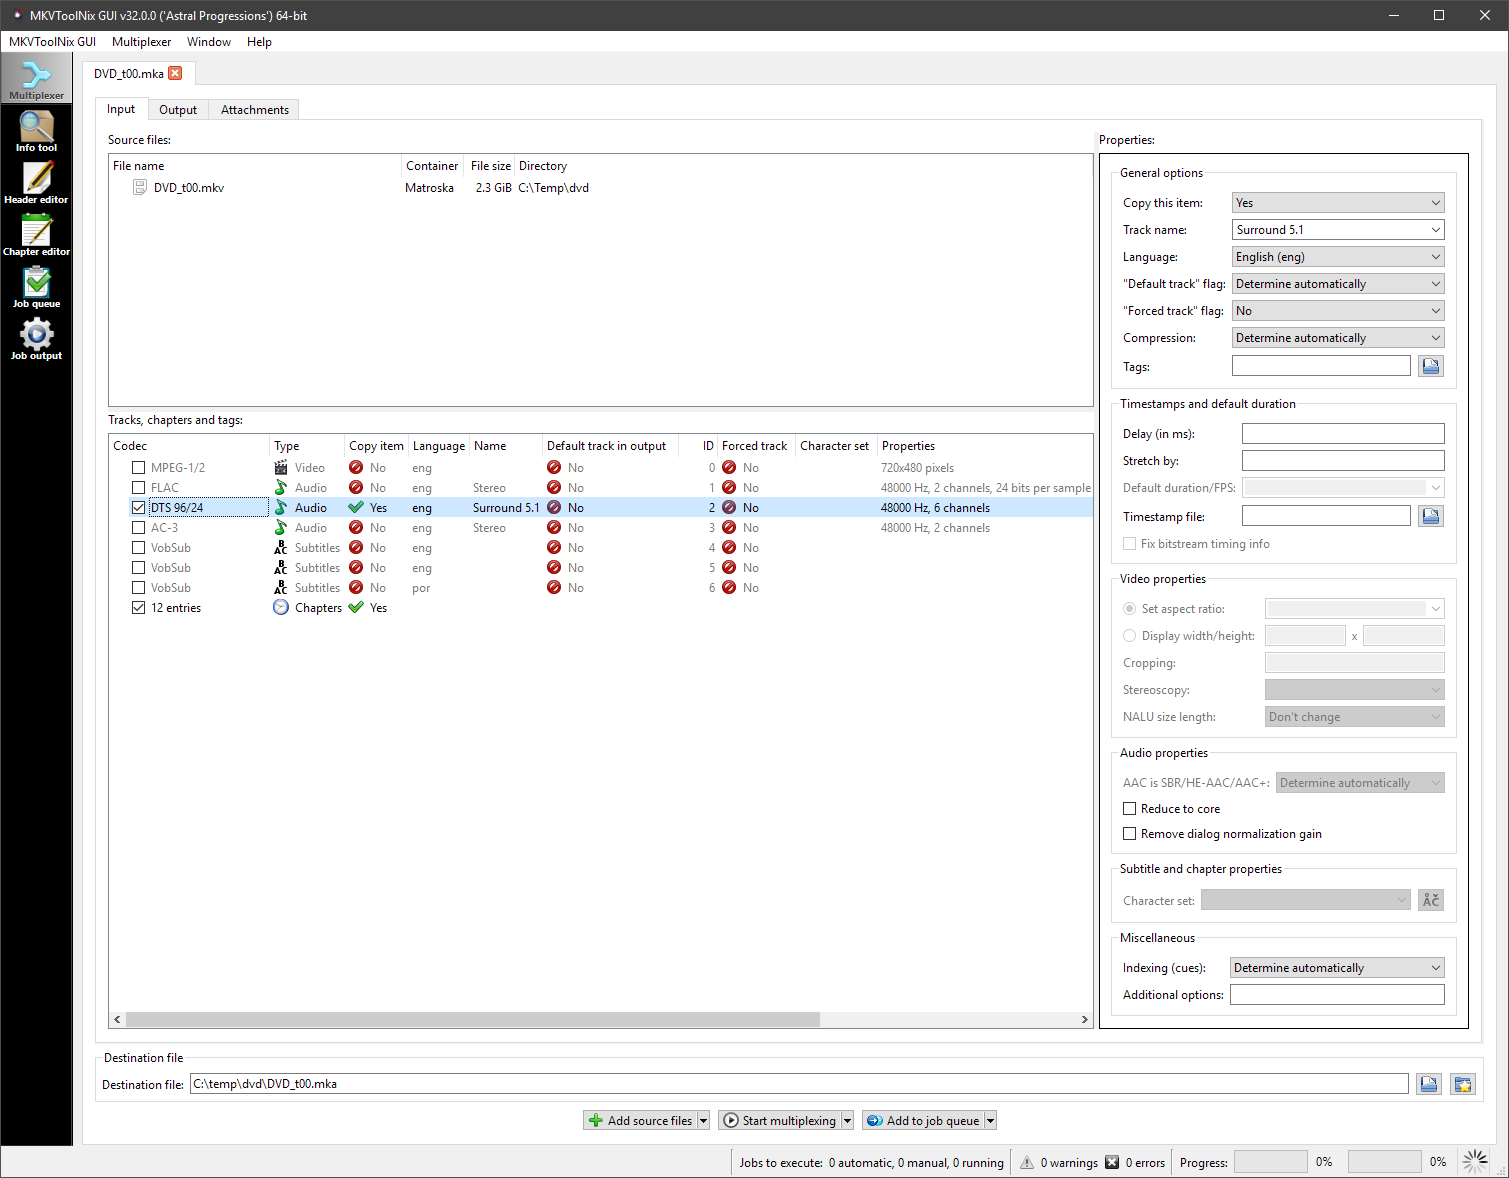
Drag the newly created MKV file to the source file section of the input tab in MKV Merge.
This will scan the MKV and list the tracks it contains within.
Now deselect everything but the audio track you want to convert to MKA, and the chapter file.
Though it won't prevent you from selecting multiple tracks, I recommend that you only select one.
I have selected the 5.1 DTS track for this example:
Now switch to the output tab.
The only thing we need to change here is setting the split mode to "Before chapters" and telling it to split before "all" chapters.
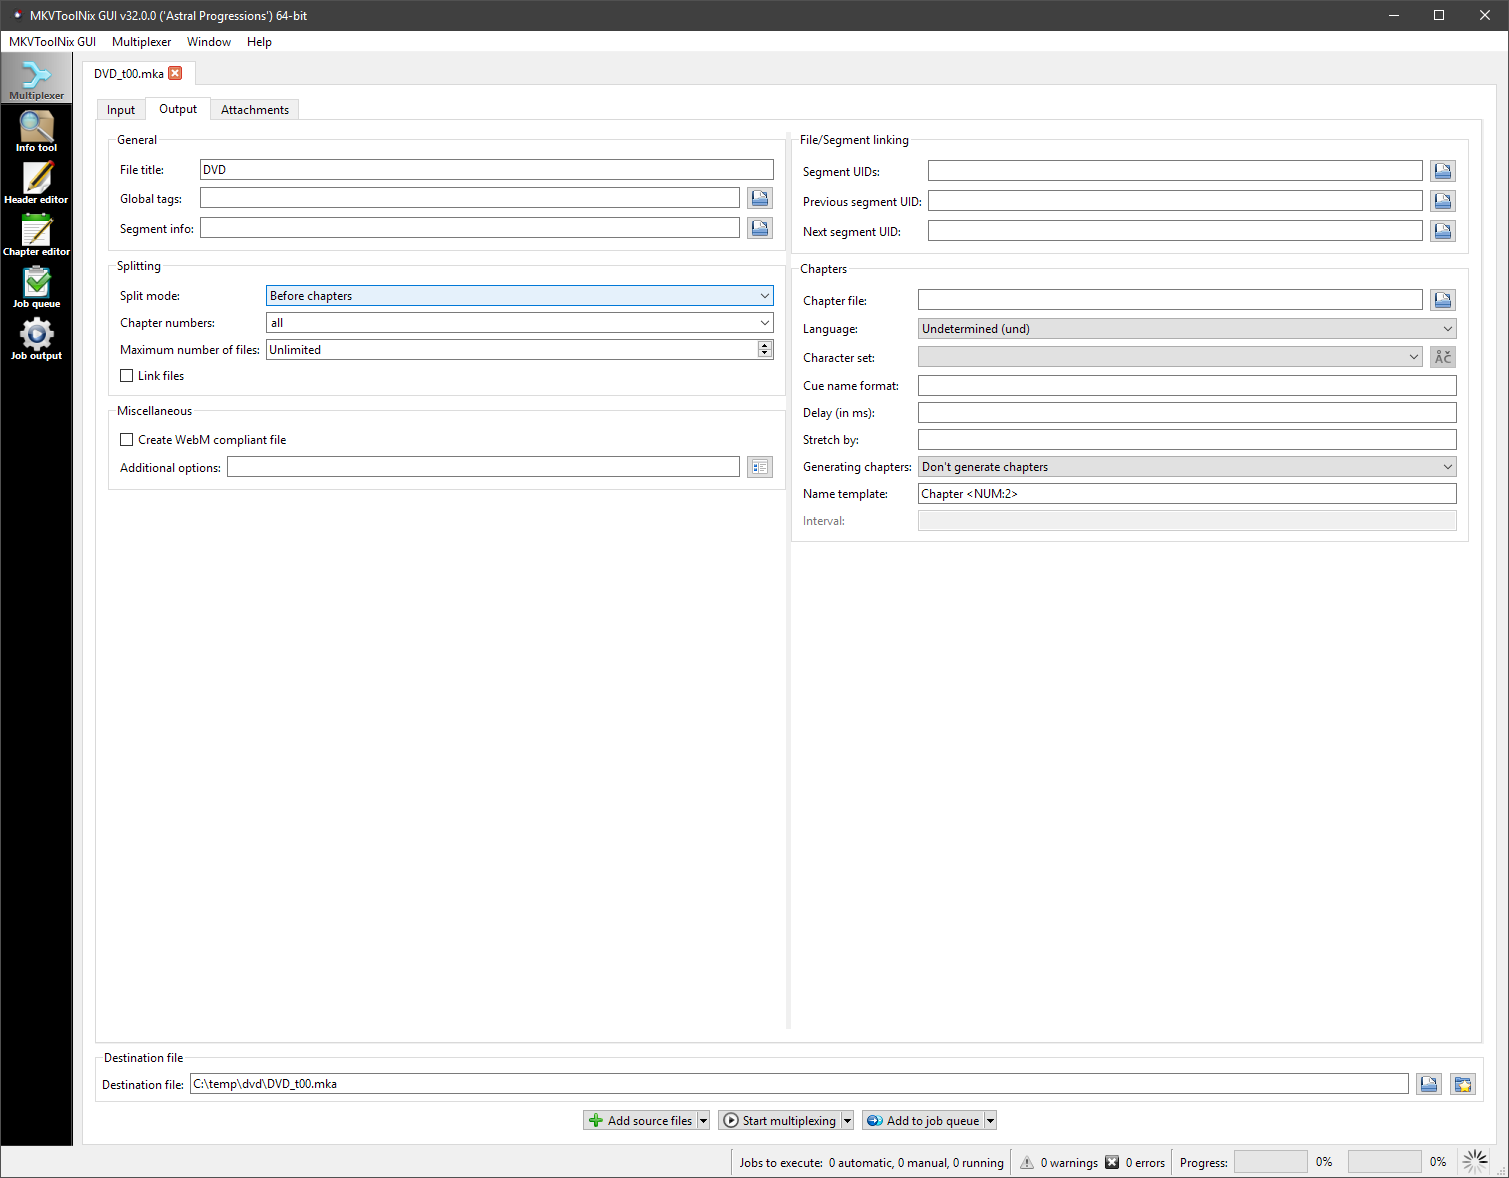
Once this is set, click the "Start multiplexing" button at the bottom of the window.
A few seconds later, and MKV Merge should have split the MKV file into individual MKA audio tracks:
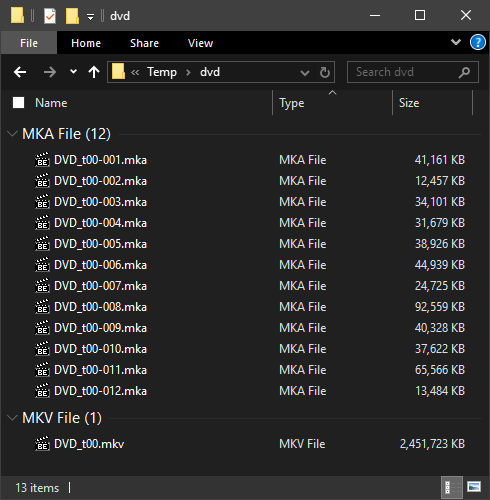
In this example, the ripped DVD is 2.33GB, and the extracted DTS 5.1 MKA audio tracks are only 466MB since we have discarded the unwanted video and audio tracks.
Now all you have to do is import the MKA tracks to Media Center and tag them.
Method 2: Split MKV into Chapters in XMedia Recode
XMedia Recode is a free video/audio transcoding program for Windows. It can not only deal with digital videos, but also unprotected DVDs and convert DVDs to files it supports. It also offers other features. For example, you can use it to extract chapters from MKV. The whole operation is a breeze.
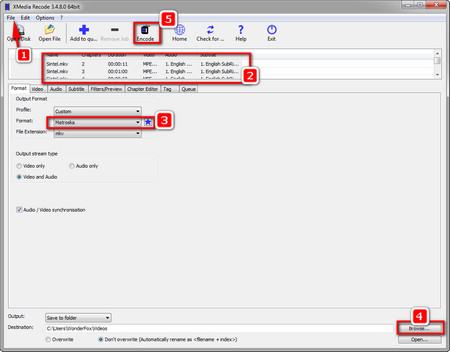 MKV Split Chapters in XMedia Recode
Step 1: Download XMedia Recode and follow its instruction to install it on your computer: https://www.xmedia-recode.de/en/download.html
Step 2. Launch XMedia Recode. On the top left toolbar, click on File > Open File to import MKV files or via the drag-and-drop mode.
Step 3. Right-click on the MKV file, and select "Show Chapters". Press Ctrl+A to select all chapters, right-click and choose "Add to queue".
Step 4. In the lower Format tab, choose Matroska MKV. It also allows you to convert videos to a wide range of formats, such as 3GP, MP4, MOV, and so forth.
If you want, you can customize video parameters under the Video/Audio/Subtitle tab.
Step 5. Navigate to the bottom of the software and choose a destination for saving the output chapters. After that, click on "Encode" on the top menu bar to start to split MKV by chapters.
Once you get the right tool, it can be very simple to split MKV by chapters. There are many other good tools that will help you extract chapters from MKV. We have just summarized two popular and effective methods as shown above. If you have any good suggestion, you're welcome to share it with us.
Another version
Extract Audio from MKV without Re-compressing Using MKVToolNix
MKVToolNix is the GUI interface for MKV-specific processing tools such as mkvextract, mkvmerge, mkvinfo, mkvpropedit, etc. It can extract multiple audio tracks from an MKV file. Below are steps.
- Install and launch MKVToolNix.
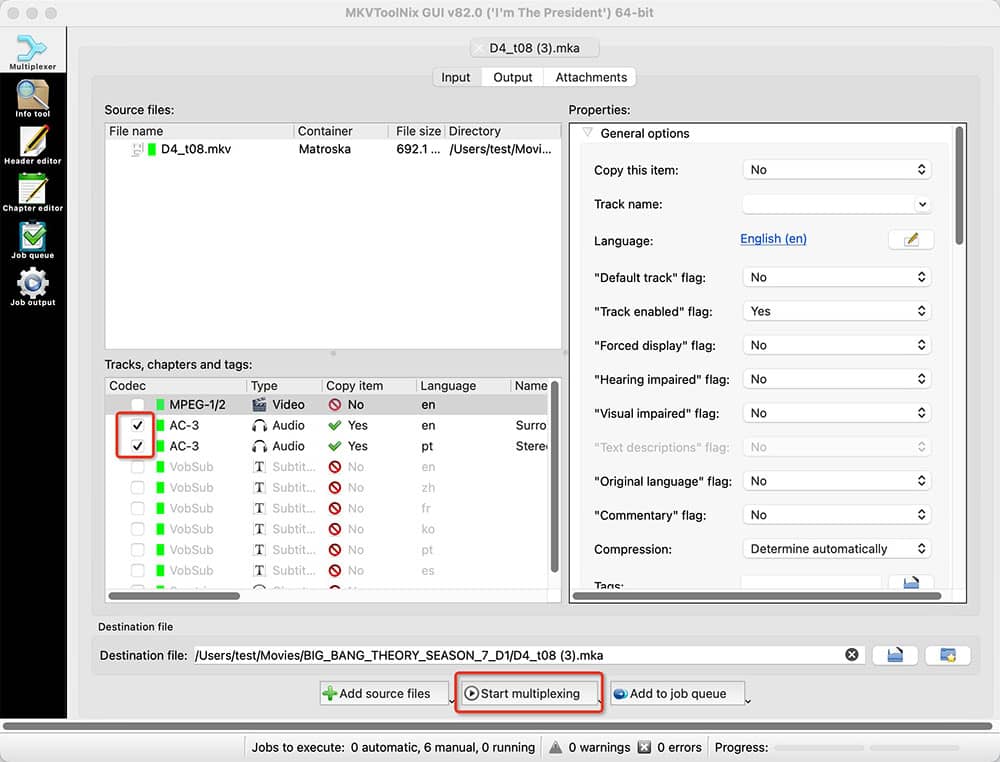
- Drag-n-drop MKV to the “Multiplexer” tab.
- In the "Tracks, Chapters, and Tags" section, uncheck the options you don't need and keep the audio options you want.
- Specify the output directory. Or directly use the default path, which stores MKV videos.
- Click the “Start multiplexing” button to extract 5.1 audio from MKV.
Tip 1: The output audio will be in MKA format. It is not playable on some media players like QuickTime. Use VLC instead. Additionally, if you rip multiple audio streams into a single MKA, you can switch between them during playback.
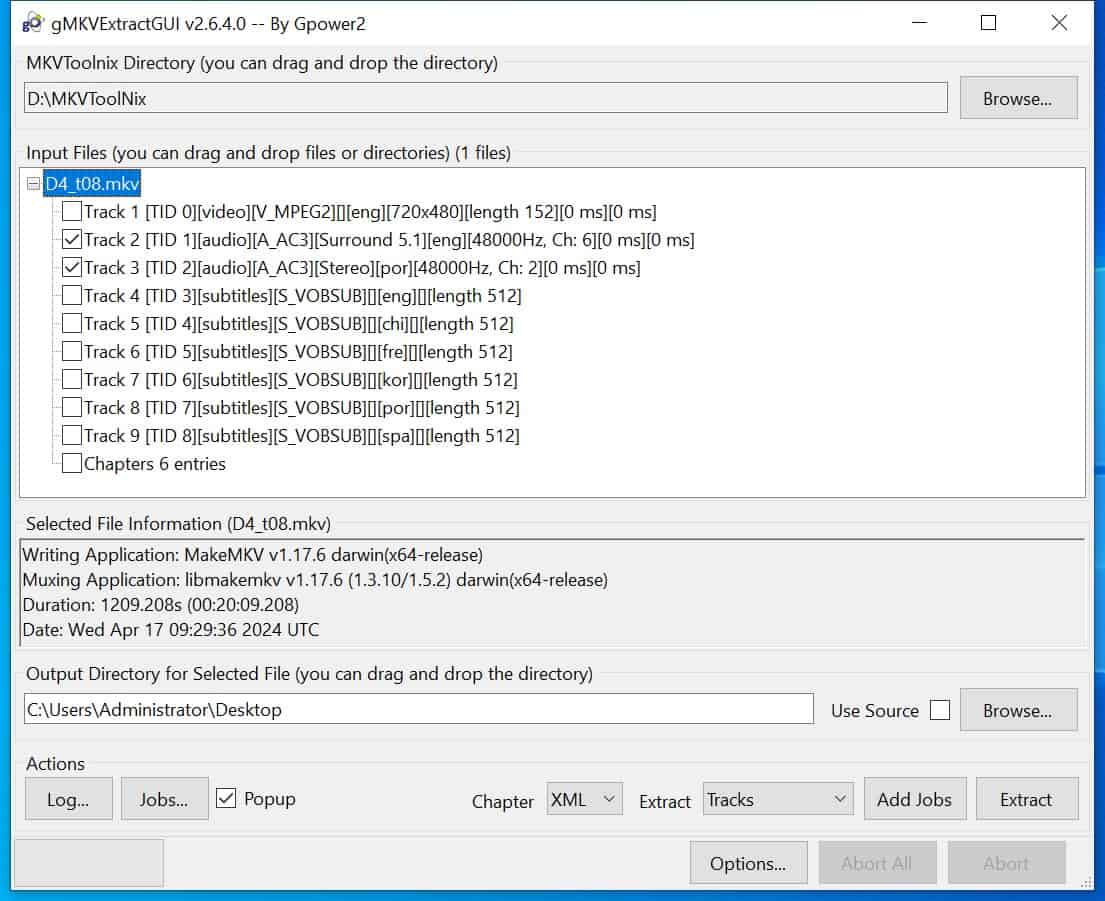
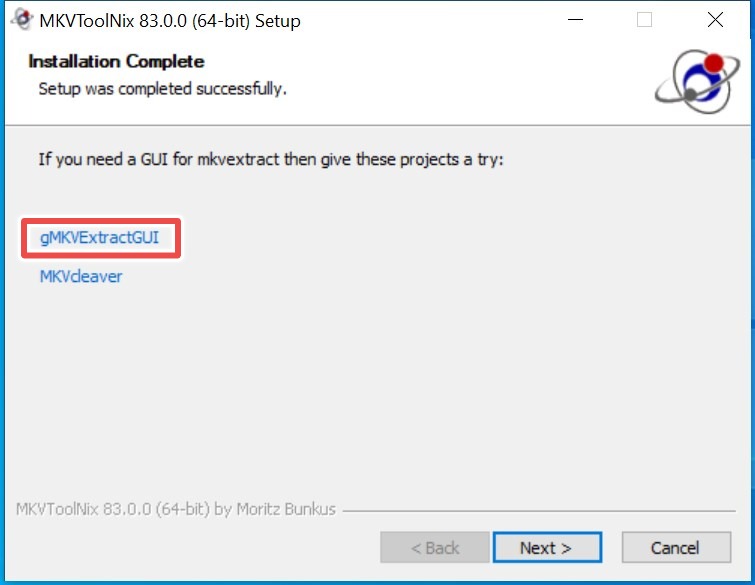
Tip 2: If you are using Windows, you're also capable of utilizing one of the component tools for MKVToolNix - gMKVExtractGUI. The biggest difference compared to MKVToolNix is that it can't import video formats other than MKV.
- After MKVToolNix is installed, there will be a prompt "If you need a GUI for mkcextract" on the Setup interface, you can click to install gMKVExtractGUI. Or go to https://sourceforge.net/projects/gmkvextractgui/ to install.
- Drag and drop MKV to the “Input Files” field.
- Check the audio tracks you want.
- Press “Extract” to strip MKA from MKV without decompressing.
